Frequently Asked Question
How To Use WiFiCloudNet Dashboard
How to operate the dashboard ?
Logging into your account will open wificloudnet dashboard which displays all the available dashboard options and features on the left hand side menu. Dashboard top bar features option to overview your created networks by selecting it in drop down menu.
How to create & delete network ?
Create Network
Login to your account → Click Manage Network option on the left menu bar of the dashboard. New window will open, listing all your networks and having Create Network button at bottom of the list.
 .
Click Create Network button to create new network. New window will open as displayed below.
.
Click Create Network button to create new network. New window will open as displayed below.
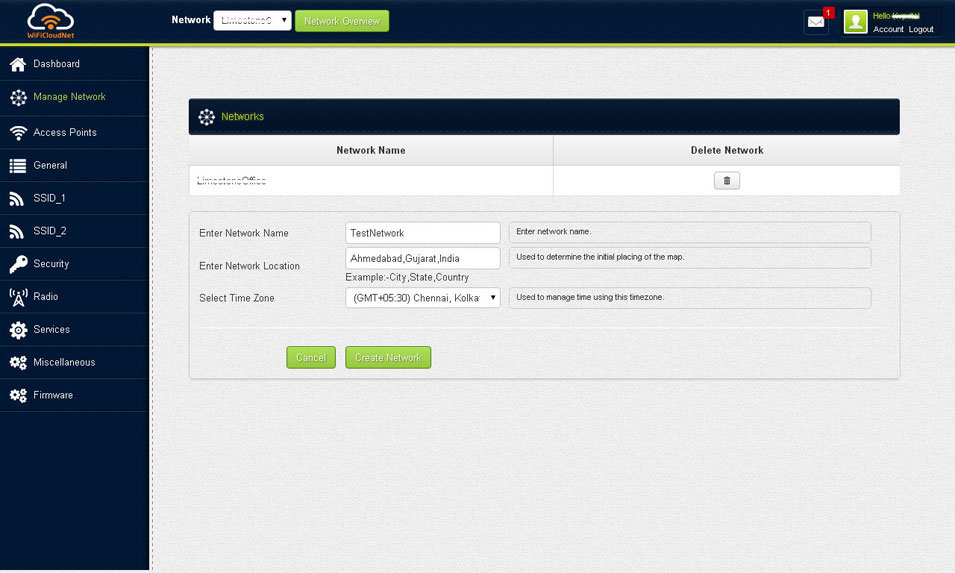 To create the new network enter your network name and network location in the respective fields, then select the time zone of your network location from drop down menu. Once you have filled the three fields click the Create Network button. Your new network is now created. All created networks are displayed in this window.
Delete Network
Login to your account → Click Manage Network option on the left menu bar of the dashboard. New window will open, listing all your created networks.
Corresponding to each displayed network there is a button with symbol of thrash / dustbin. By clicking this button you can delete the desired network.

How to Add and Delete Access Point ?
There are two methods for adding Access Point into your network.
Method 1:
From the drop down menu located on the top horizontal bar of the dashboard, select the network into which you want to add the Access Point.Then click the Access Point option on left hand side menu of dashboard to manage the Access Point (Node) in the selected network. It will open new screen listing all the created nodes in the selected network with their details and buttons for editing / deleting the node.
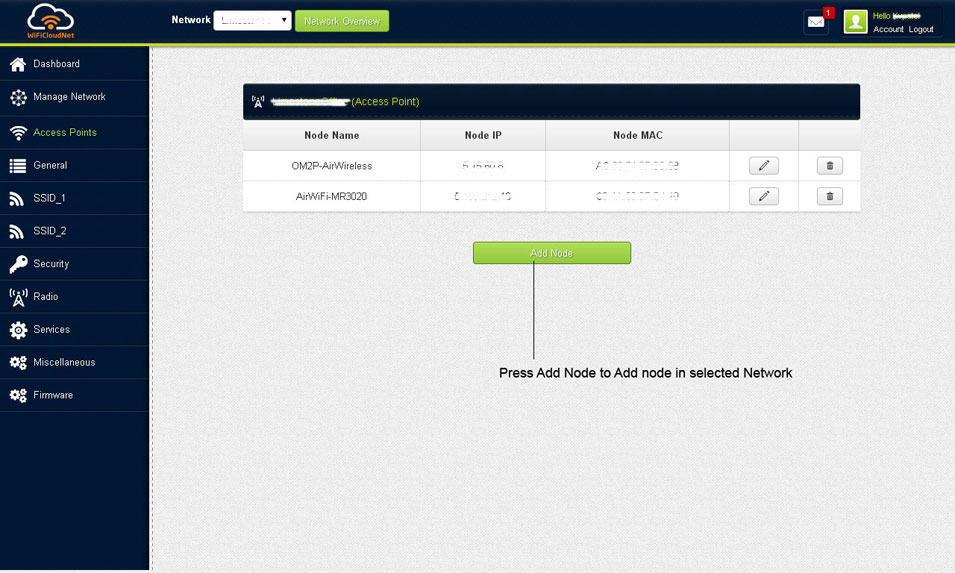 Click ‘Add Node’ tab to add the node.
New screen will open as displayed below.
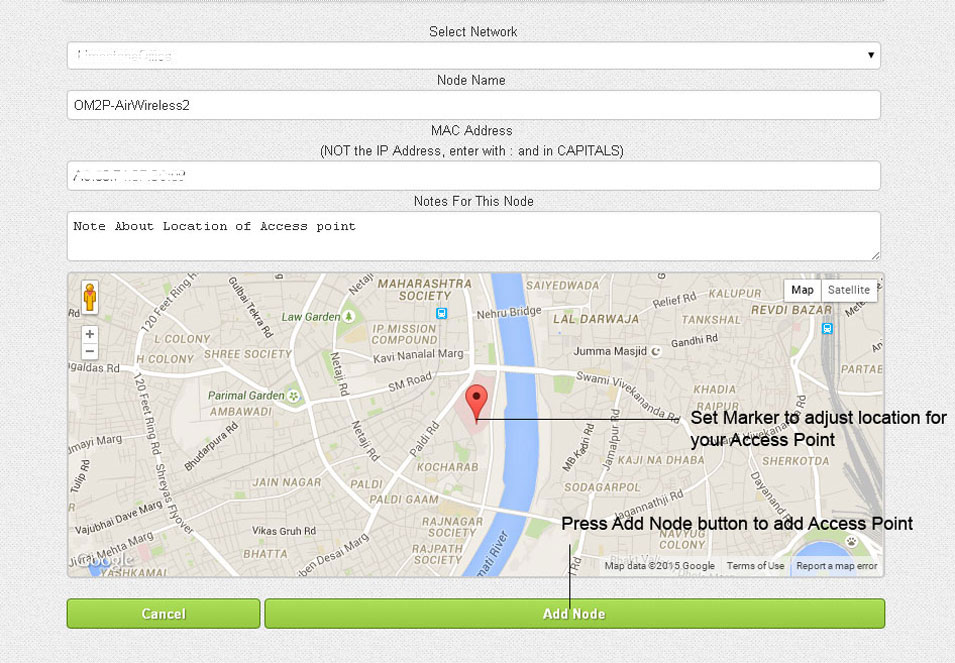 Screen will display the empty fields for filling the details of new Access Point (Node) to be added in the network. A Google map, centered on the address you entered when you created the network, will also appear on the same screen.
Node Name: This name is used to reference its location
Node MAC Address: This is alphanumeric 12 digits found on product or product box and should be entered in capital.
Notes: It is optional field to enter any detail about the node in case required.
On the Google Map set / adjust the location of your Access Point and then click ‘Add Node’ button beneath the map to add that Access Point.
Repeat the above procedure for each node to be added.
Method 2:
Select the network, in which you want to add the Access Point, from the dropdown menu located on the top horizontal bar of the dashboard and click the Network Overview button adjoining to it.
A Google map, centered on the address you entered when you created the network, will open.
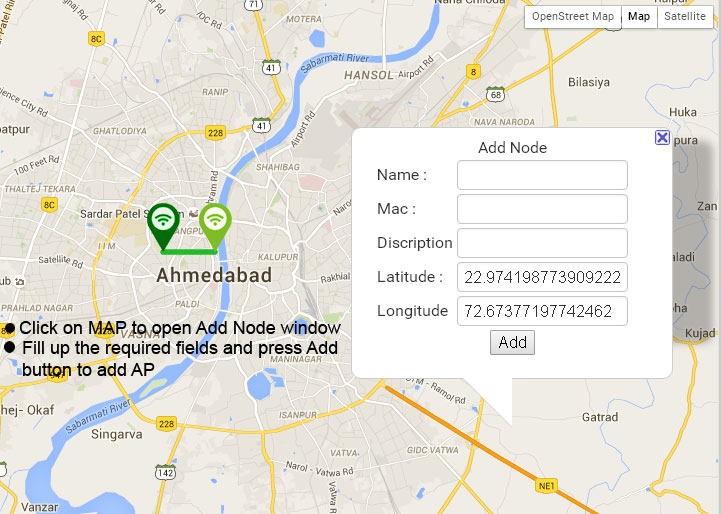 Clicking on the map will open the ‘Add Node’ window with the fields to be filled in. Fill the Access Point Name, MAC Address and Notes (Optional) of the Access Point. On the Google Map, set / adjust the location of your Access Point and then click ‘Add’ button to add that Access Point.
Repeat the above procedure for each node to be added.
Deleting the Access Point
Select the network, from which you want to delete the Access Point, from the dropdown menu located on the top horizontal bar of the dashboard.
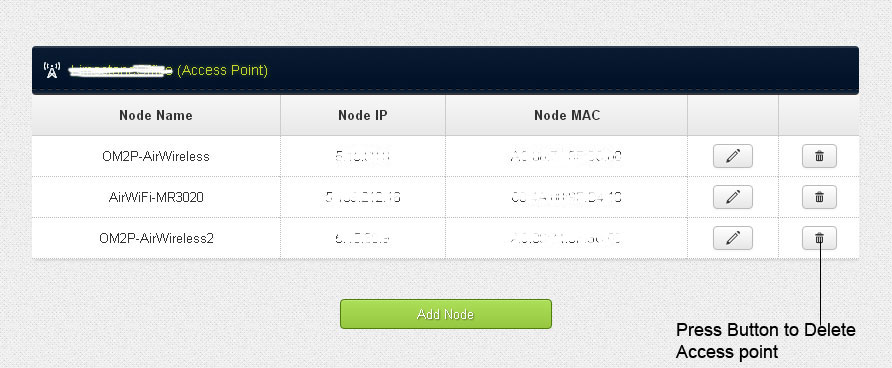 In the displayed screen all the Access Points in the network will be listed in tabular form with their details. There is edit and delete buttons corresponding to each node. Click the delete button of the node which you want to delete.
How to Configure SSID #1 : Settings ?
SSID #1 is Public SSID and offers various features of Captive Portal like Splash Pages, ability to control Bandwidth, access using Vouchers, setting Download and Upload speed limits, and many other features that are listed in the SSID setting menu.
After login in to your account click ‘SSID_1’ option on the left hand side menu. New Screen will open.
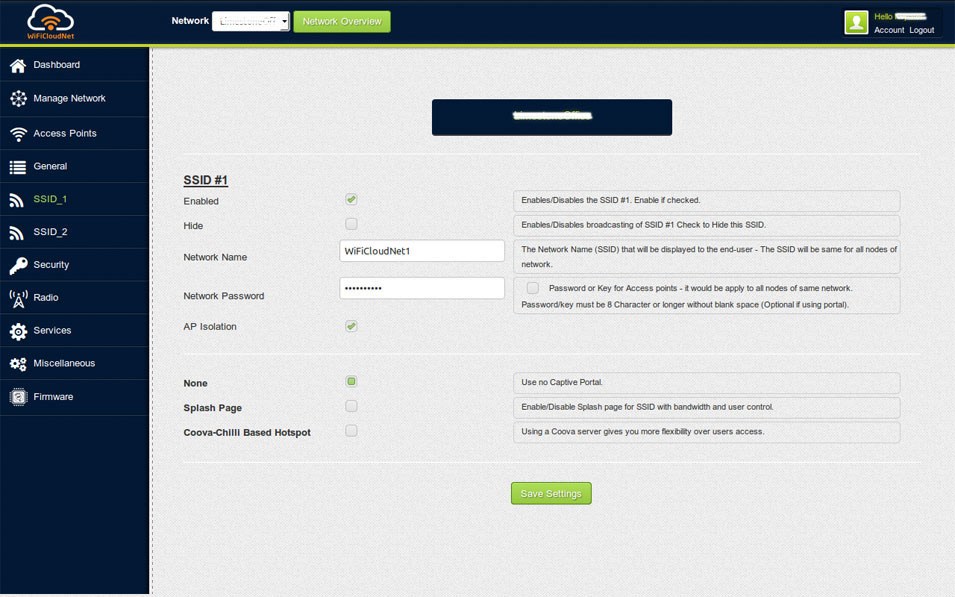 This screen has two parts. First part has options for Enable / Disable and Broadcast / Hide SSID#1. Check the box as per your requirement. Enter Network Name and Password field, and then check / un-check AP Isolation box.
Second part has options on Captive Portal. You can select ‘None’ for not using any Captive Portal, ‘Splash Page’ for Standard Hotspot or ‘Coova-Chilli Based Hotspot’ for settings. Make any one selection and then click Save Settings.
Based on your selection of ‘Splash Page’ or ‘Coova-Chilli Based Hotspot’ new screen will open.
Screens for both the options have all the SSID features on first column and feature description in third column, check boxes and entry fields for SSID settings are in second column.
Features descriptions are self explanatory for customizing the settings.
Click Save Settings after customizing.
Splash Page Setting Screen
 Coova-Chilli Based Hotspot Setting Screen

How to Configure SSID #2 : Settings ?
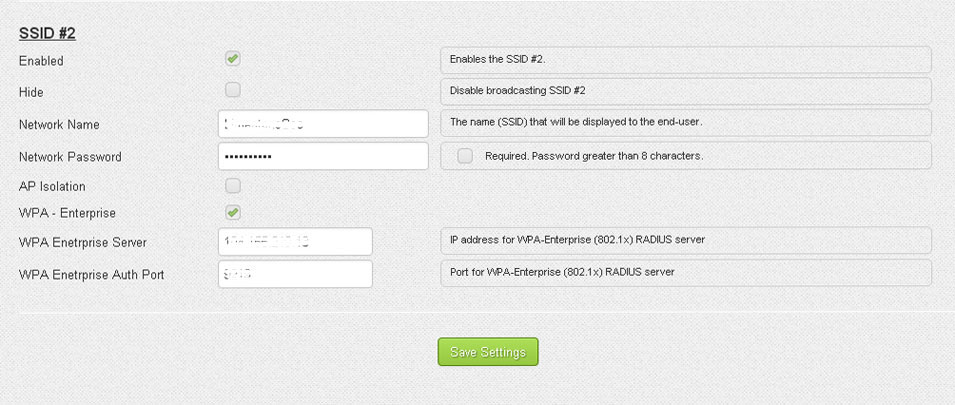
SSID #2 is Private SSID.
After login in to your account click ‘SSID_2’ option on the left hand side menu. Screen for SSID#2 setting will open.
 Features descriptions are self explanatory for customizing the settings.
In case to use WPA Enterprise server, check the corresponding box and fill the server IP and Port details.
To finish, click Save Setting button.
How to Configure Gateway LAN Block ?
Gateway LAN block is security feature to prevent users on wireless networks from accessing your wired clients.
Login to your account → Click Security option on the left hand side menu of dashboard.
Below screen will open.
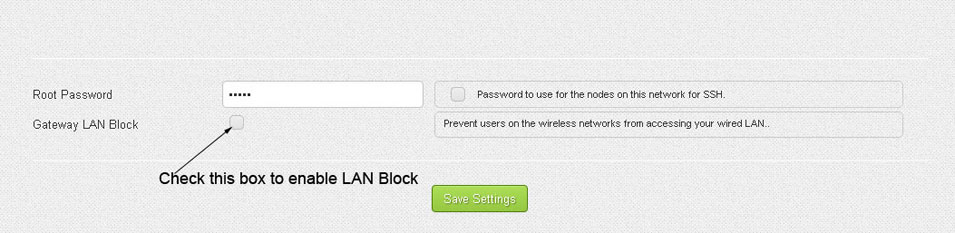 Check the Gateway LAN Block box to enable it.
To finish, click Save Settings button.
How to Configure Block/Un-Block Services ?
Login your account → Click Services option on left hand side menu of dashboard.
Services option allows you to Block and Un-block services like FTP, SSH, SMTP, POP AND IMAP.
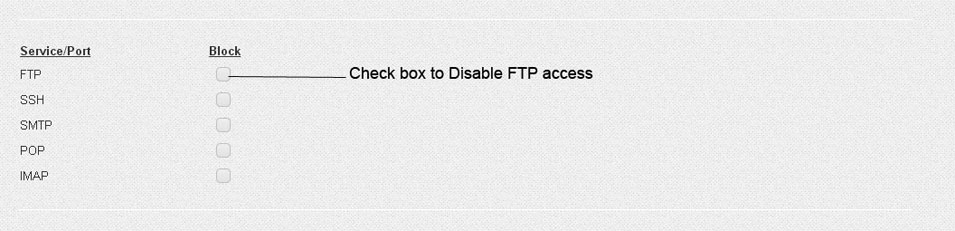 Check the box corresponding to the service you want to block / disable.
How to Configure Remote Logging Server ?
Login your account → Click Miscellaneous option on left hand side menu of dashboard.
 Check box to Enable Logging Server.
Enter Remote Logging Server IP address to redirect the node logs to remote server.
How to Configure Schedule Reboot & Reboot Individual Access Point ?
Login your account → Click Miscellaneous option on left hand side menu of dashboard.
 Select the Enable Reboot Schedule option to enable the schedule reboot
Set the Reboot Date and Reboot Time to schedule reboot
To reboot individual node, select node from the list, when dashboard received the configuration update request from node.
How to Configure Custom script ?
Login your account → Click Miscellaneous option on left hand side menu of dashboard.
 Select the custom.sh to enable custom script for selected network
Set custom.sh server path ( Script name should be custom.sh on server )E.g. if custom.sh saved on http://xyz.com/script/custom.sh than use http://xyz.com/script as your custom.sh server
How To Flash WiFiCloudNet Firmware
How to Flash OM2P with WiFiCloudNet firmware ?
How to Flash WiFiCloudNet firmware on Ubiquiti PicoStation2 ?
How to Flash WiFiCloudNet firmware on TP-Link MR3020 ?
Firmware
What is the Root password for WiFiCloudNet firmware?
Password: wY5m#C0n8